
How to Revive Your Old Shirts and Dresses
>> Friday, July 15, 2016 –
business,
christmas,
Christmas gifts,
crafts,
craftsbykai,
DIY,
engraved,
gifts,
home-based business,
kai,
singapore,
wooden boards
Almost 15 years ago, I bought my first sewing machine. Well, it was not exactly a professional sewing machine. It was a sewing genie I saw on TV. It was small, relatively easy to use, and very portable.
 |
| photo from amazon |
I bought the sewing genie mainly because I was inspired by my friend, and then officemate, Kai. She came up with the nicest-looking tops and sews them all by herself! The inner fashionista in me was awakened and I decided to join the bandwagon. I bought my own mini sewing machine and visited Carolina's with Kai during our lunch breaks. I learned a few simple patterns by asking Kai countless questions. And before I knew it, I was creating my own tube and halter tops from home. That was in back in 2002.
Kai is now based in Singapore but she's still as crafty as ever. The other day I saw her post a DIY Off-shoulder top that seem easy to follow. I loved it and could not wait to take out my sewing genie again after 15 years. I asked Kai's permission to share her step-by-step guide on the blog for my own reference and for you too!
Materials:
- Get an old polo shirt or shirt dress
- Garter, preferably a centimeter wide
- Scissors
- Pencil
- Ruler
- Pins
- Sewing Machine (or in my case, Sewing Genie!)

Step 1: Draw a horizontal straight line about an inch from the collar

Step 2: Take the line up an angle at the sleeves

Step 3: Cut! (That's my friend Kai in action)


Step 4: Take your garter and measure around your upper torso. Then cut that garter.


Step 5: Overlap the ends and sew. Make sure that it's not too loose or too tight.

Step 6: Pin the four equidistant points onto your shirt. Kai suggests pinning the front and back first followed by the sides or shoulders.


Step 7: Prepare your threads. It would be best if they coordinate with your shirt's color.

Step 8: Sew the garter onto the shirt with a zigzag stitch

Stretch the garter as you sew so that it covers the edge of the shirt well

The zigzag does not have to be neat as this will get covered.

Step 9: Fold it inside and sew the front to hide the zigzag

And Voilà! You now have a trendy off-shoulder top. That's my friend Kai wearing her own creation.

Kai now runs a home-based business, Crafts by Kai, from Singapore and produces various personalized products from stamps to wooden boards. Her latest creation are these engraved wooden kitchen products that are both beautiful and functional. They would look awesome in any kitchen and are perfect gifts for family and friends.


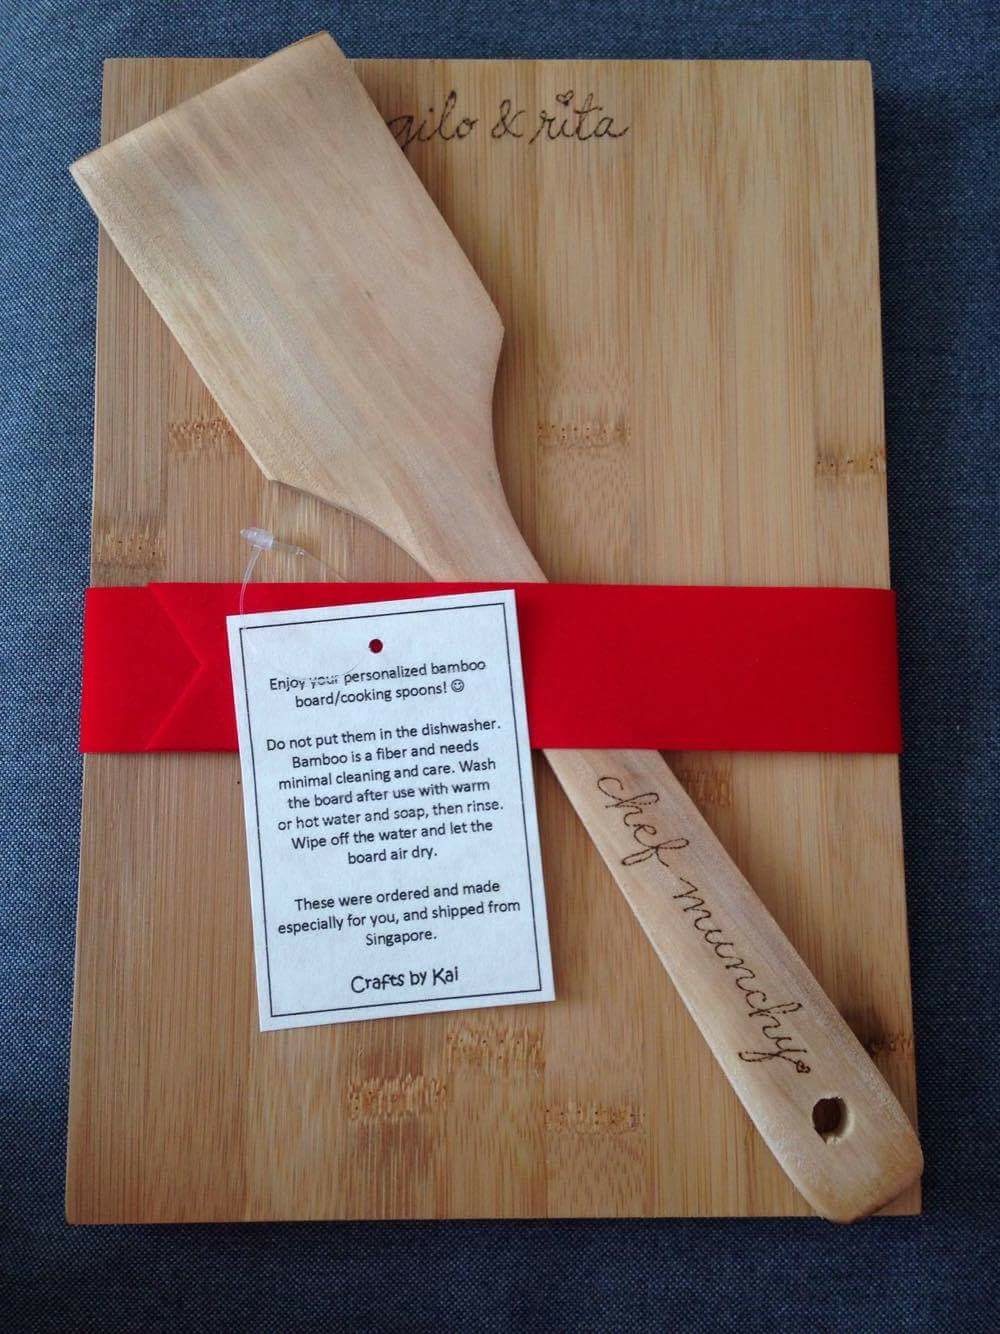


The boards are priced at P450 each and P600 for the Christmas sets. Crafts by Kai ships worldwide! Pricing will be finalized upon order due to varying shipping costs. You may order the boards and inquire via email at kai_sorianostacruz@yahoo.com .
I wish I can be as crafty as Kai! Her output is always so seamless, it's almost hard to believe they were handmade by her. Do reach out to her for orders and ask about other personalized items that she can do for you. It's never too early to start scouting for Christmas gifts!


.JPG)


Wow, such an amazing post...
Kids Gps Watch
GPS Kids Watch